
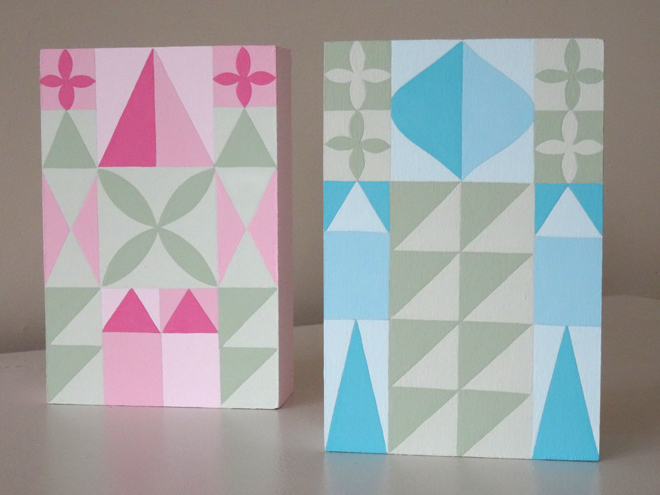
I’ve always admired the geometric designs Mary Blair created for It’s a Small World, one of Disney’s most beloved attractions. Her style was so completely original and her use of colour was innovative and unique. Coming up to the celebration of It’s a Small World’s Fiftieth Anniversary, I wanted to create some Mary Blair inspired art of my own.
If you’re feeling inspired, here’s what you’ll need:
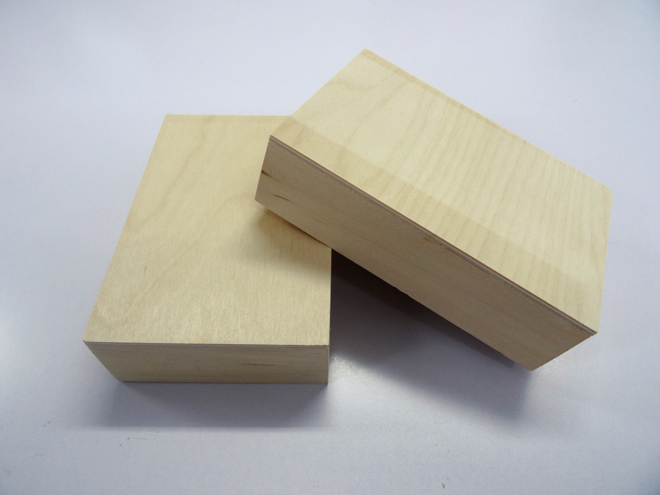
Rectangular Wood Blocks – These are finished ‘canvases’ ready to be primed and painted. They are available in different sizes and widths and are sold at art supply and craft stores.
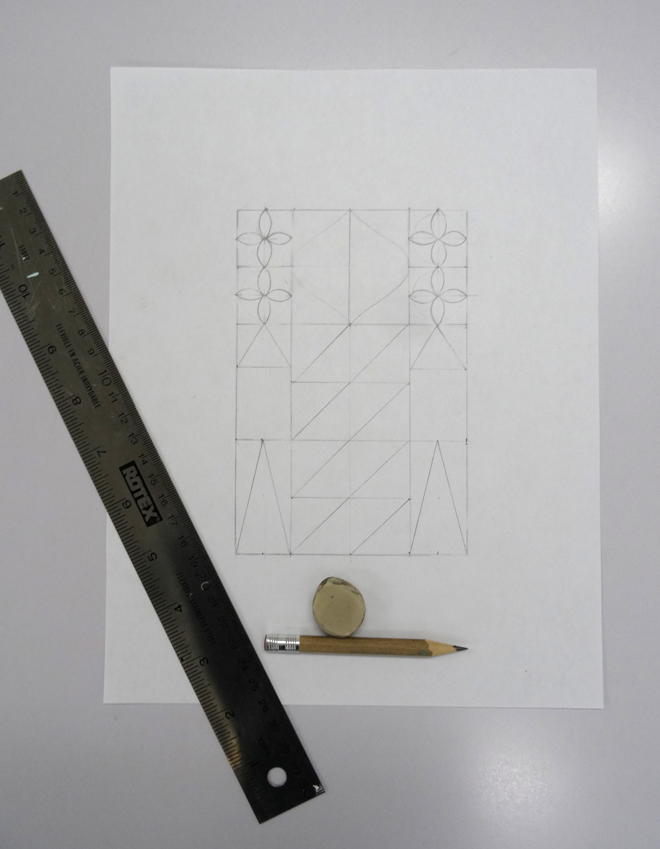
Drawing Paper, Carbon Paper, Scotch Tape, Pencil, Eraser, Ruler – The necessary supplies to create your own Mary Blair inspired design – and transfer it to the ‘canvas’.
Acrylic Paints – Various colours of your choice, including white for mixing and to use as a primer.
Fine Art Brushes – Various sizes including a square-tip and fine point.
To Begin:
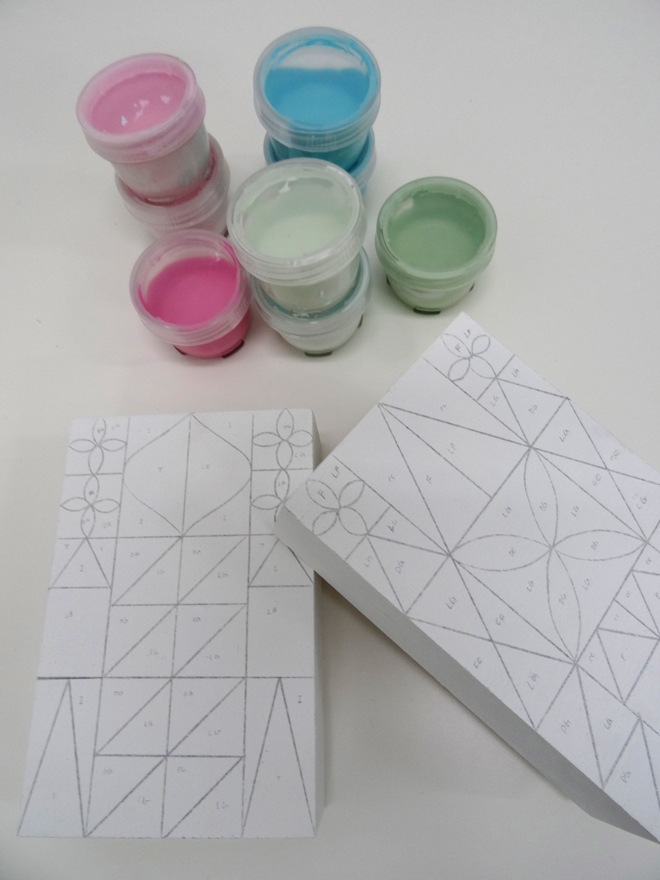
1. Measure the wood block. Using your ruler, draw out a rectangular shape in the exact same size. Divide your drawn rectangle into three columns – with the widest column in the centre. Using your ruler, continue to subdivide the columns into even geometric patterns. It’s amazing how wonderful simple squares, triangles and rectangles look when stacked together.
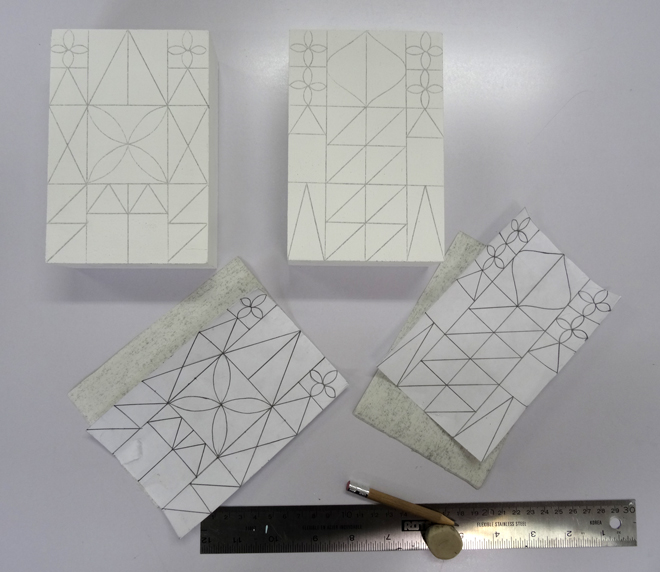
2. To prepare your wood ‘canvas’ for painting you may have to sand down rough edges. Also remember to wipe the wood block free of any loose fibres that will otherwise get stuck in the paint. Give the wood block at least two coats of acrylic primer or white acrylic paint to create an even base. Let dry.
3. To transfer your geometric pattern to the primed wood block carefully cut out the drawing – it will need to fit exactly. Cut a matching size rectangle of carbon paper and tape it to the back of your design. Tape the drawing and carbon paper to the wood block. Make sure not to cover any lines with tape or they won’t transfer. Using a pencil and ruler trace over the lines of your design. When complete, remove the drawing and carbon paper from your wood block – there is a perfect pattern waiting to be painted!
4. Choose a colour palette. I chose three shades of blue, three shades of pink and two shades of green as accents. Any colour scheme will work beautifully. I always custom mix my paint colours and I like to add a bit of white for a creamier texture. Using pigments straight from the bottle is okay too!
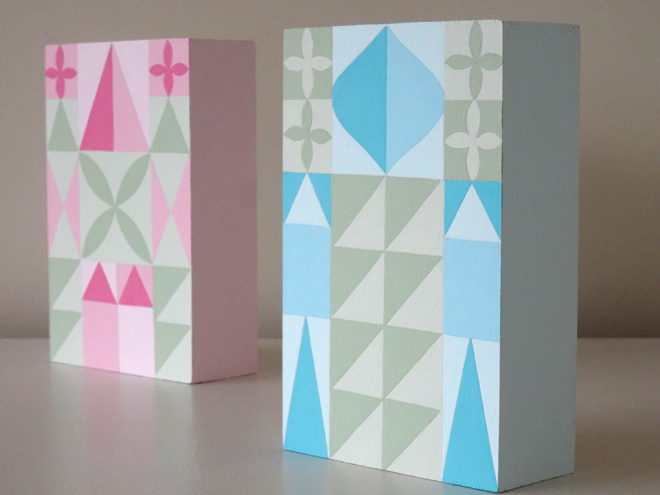
5. Plan your colour combination. To create a balanced composition, plan out where each shade will go before you begin painting – like a custom paint-by numbers. If the combination isn’t turning out as you planned, adjustments are always possible!
6. Take a deep breath. Every section will require at least two coats of paint – I always give three. Using a square-tip brush will create clean edges. To touch up corners, use the finest point brush you can find.
The detailed work is well worth it – just to have a little Mary Blair inspired art of your own!
2 Comments
Alice
June 30, 2014 at 10:47 amI love these! I need to mKe some for my so ‘so small world nursery. Could you share the paint colors you used – especially the neutral ones?
Barbara
July 1, 2014 at 9:24 amSo glad you enjoyed them – they will be perfect for a nursery! For this project I used Delta Creamcoat Paints in Blue Heaven, Tahiti Blue, Paradise, Fuchsia, Pink Quartz, Village Green, Eucalyptus, Light Foliage Green and Green Sea. Some shades were mixed together, and all were mixed with white. Mixing in white paint is a great way to neutralize whatever palette you choose. Good luck!